The importance of the Destination Tag on Ripple transactions

Mon Nov 26
Reading time: 4 minute(s)

Simple, yet efficient, the Destination Tag (or Memo) is a 10-number code that is generated right after you create a Ripple (XRP) deposit address. Its purpose is to identify the recipient of a certain Ripple transaction since most of the crypto exchanges commonly use a single XRP address for all of their traders. Such code can be considered an important piece of information security once each customer is entitled to a unique Destination Tag, avoiding the existence of mix-ups.
Why has the Destination Tag been created?
Ripple’s developers implemented the Destination Tag because it was too expendable to generate a considerable amount of XRP addresses. This way, by creating the Destination Tag not only they prevented the need to dispose of a more significant sum of money but also simplified the whole process by bringing forth the possibility of verifying all incoming Ripple deposits into a sole XRP address.
Thus, the existence of the Destination Tag makes the monitoring of a particular XRP deposit something really practical, hence it is fundamental for the success of operations with Ripple.
Enhanced safety for your investments
In case you want to send Ripple to someone else (or just withdraw the coin to your personal wallet) you shall provide the recipient’s wallet address altogether with your own Destination Tag. Let’s visualize how this operation will look like inside BitCanuck’s platform. Considering you already own 1,000 XRP for instance, this is the image that will appear in your screen right after you log in:
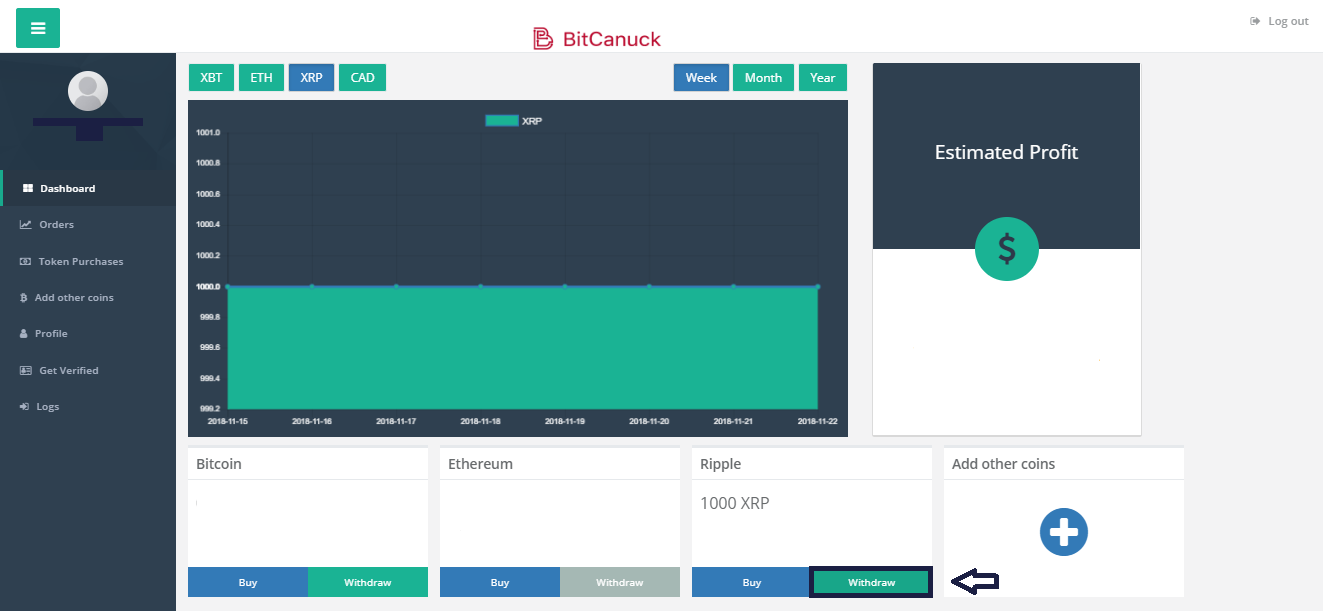
By clicking onto the option “Withdraw”, inside the tab “Ripple” on the lower part of the Dashboard (signaled by an arrow) you’ll be able to see the following screen:
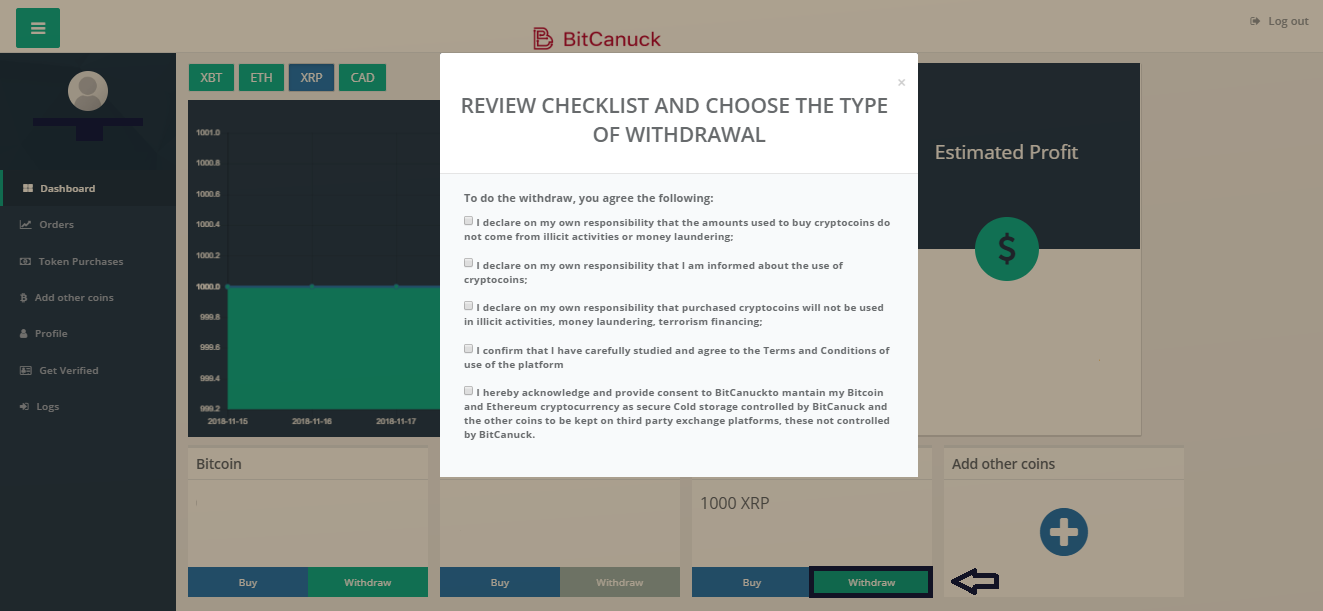
You must check all the boxes listed above in order to access the next screen. By doing so you’re declaring, to sum it up, that all your actions while making this specific transaction are of good faith and in accordance with the Terms and Conditions established by BitCanuck. After that, you’ll be able to select what kind of withdrawal operation you intend to make. In this particular case, let’s consider you want to withdraw the 1,000 XRP to your own personal wallet; to do so, just click onto the option “Cryptowallet” (signaled by an arrow):

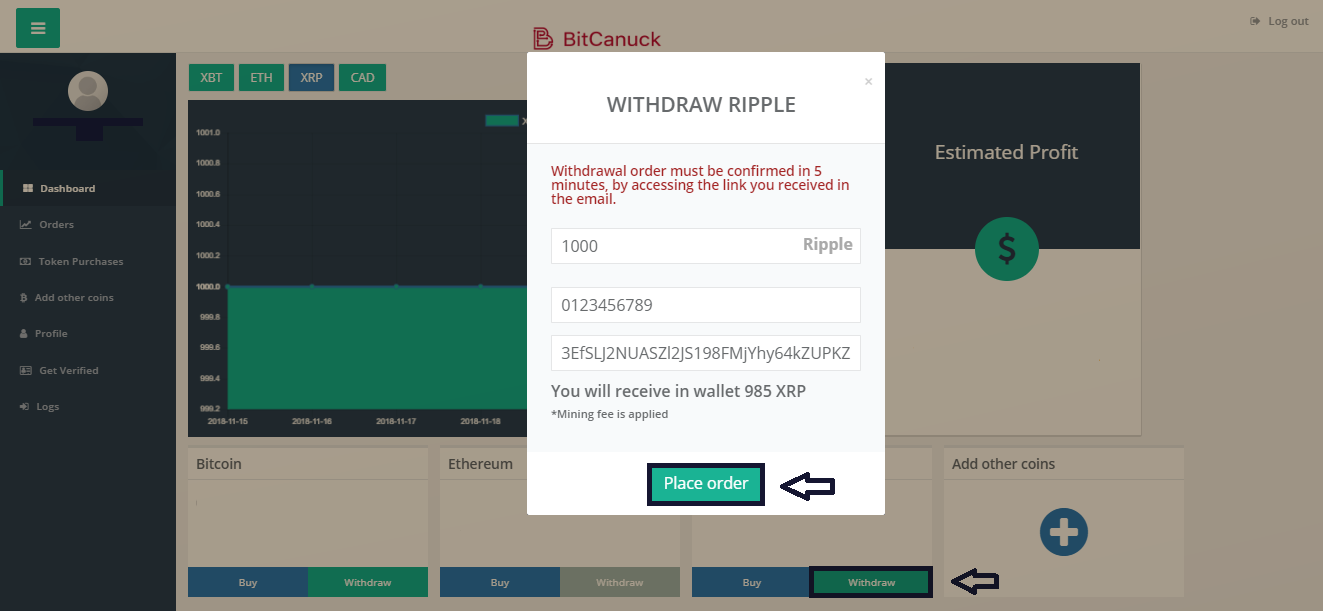
After that, you’ll access the final screen into which you shall insert the amount of Ripple you want to withdraw, the number of your own Destination Tag and finally the wallet address of the recipient of the coins:
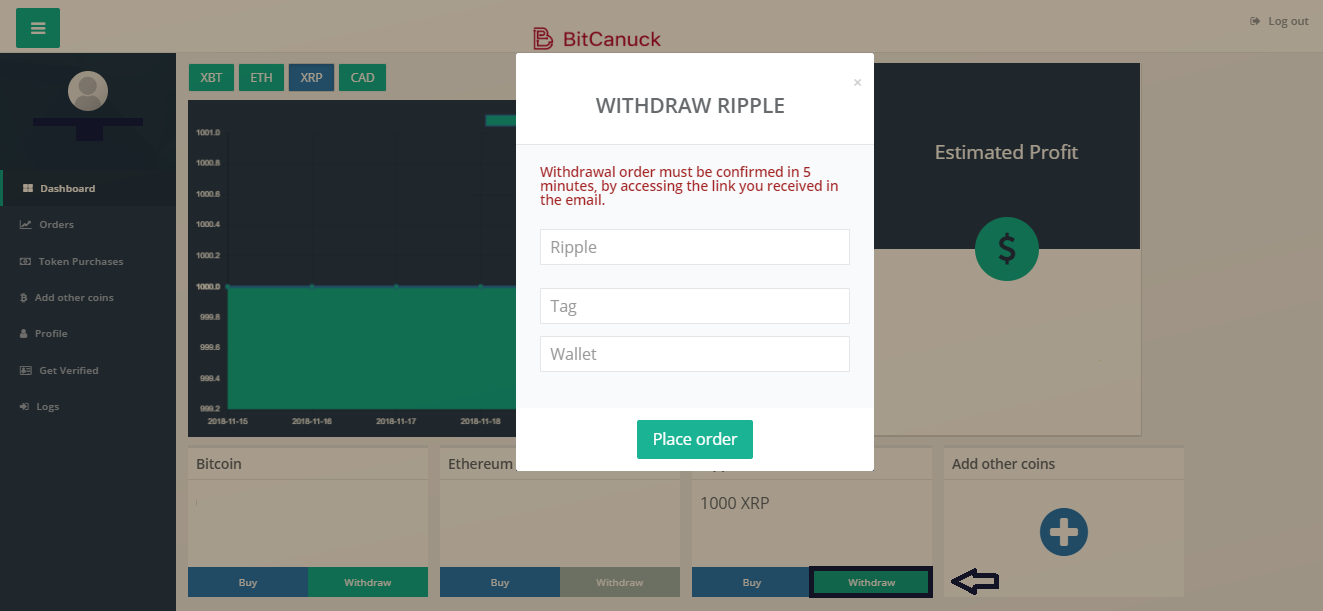
Remember that the wallet address is an alphanumeric code – in opposition to the Destination Tag’s numeric one – and even though the latter may be an optional requirement while sending XRP to external wallets the 10-number code might be requested by the recipient. This is the image that will appear in your screen right after you fill in all the information and in it, you need to click onto the option “Place order” (signaled by an arrow) to complete the operation:
Be aware that the incorrect typing of the Destination Tag will result in the loss of funds, that will most likely be sent to the bearer of the mistyped combination or to the exchange’s storage as an unassigned transaction. Therefore, we strongly recommend a double data check before concluding any operation that requires the usage of the Destination Tag.
To find out more about Ripple trading and the safe ways to start investing in it, join BitCanuck. The registration takes only a few minutes, and your funds are fully protected.